Reproducing the Wallace Collection A489 Sabre
Reproducing the Wallace Collection A489 Sabre
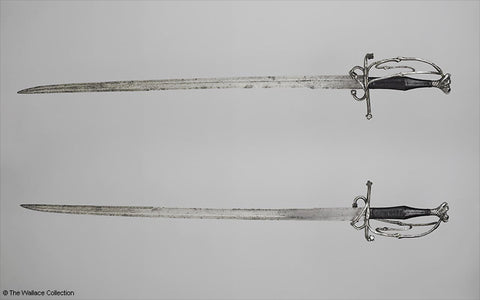
Pic of the original and reproduction swords
This renaissance Swiss sabre or saber is a stunning longsword from the first half of the 16thC and has a long gently curving hollow ground blade with a complex guard and this blog post documents the process of making the sabre.
I have loved this sword from the very earliest days of making weapons and visiting the collection and I was finally given a commission to reproduce this magnificent sword.
Starting at the beginning, I would like to thank Toby Capwell at the Wallace Collection for allowing me access to the sword and below is the accession information.
- Longsword A489
- Attributed to Itelhans Thumysen (died 1566)
- Switzerland, probably
- 1530
- Iron or steel, leather and cord
- Length: 101.5 cm
Width: 3.8 cm
Weight: 1.62 kg - Incised mark: Resembles Lyons bladesmith Possibly maker's mark, 21.5cm from shoulder
The sword was made around 1530 in the very stylish and fashionable Swiss Sabre style using a complex guard and a wickedly sharp single edged blade at a whopping 102cm/40" long. The sword looks like a beauty and when you handle it, you realise just how lovely this sword actually is - I am in love.
Like all sabres, the blade is quite complex and this simply does not show from the pictures. The whole blade is very slightly curved, though through some trick of the eye it looks far more curved than it is, and if you set it on its spine there is less than 10mm from the surface to the back of the blade even with the stepped down section.
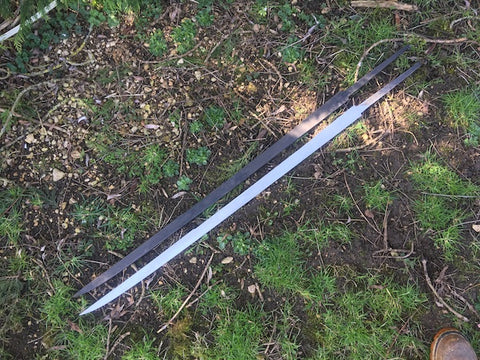
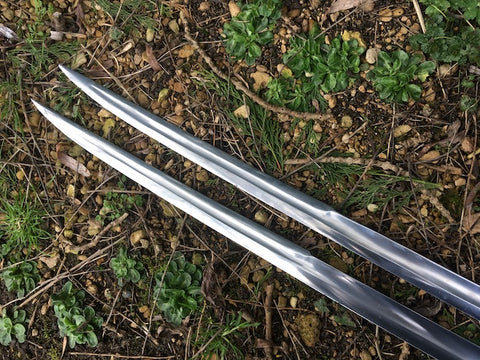
A489 sabre blades
The first 15cm of the back of the blade is 'full height', then it steps down 2mm and goes along a further 45cm and lifts up again for the yelman. The whole blade is hollow ground and then goes into an appleseed edge so that the thickness of the peak at the transition between the fuller and the edge is significantly smaller than the back edge thickness at that point. The blade starts at 9.5mm thick but tapers down to 6mm over the first 15cm and the tapers down from there. What this all means in practice is that the blade is long but relatively light. The whole sword weighs in at 1620 grams.

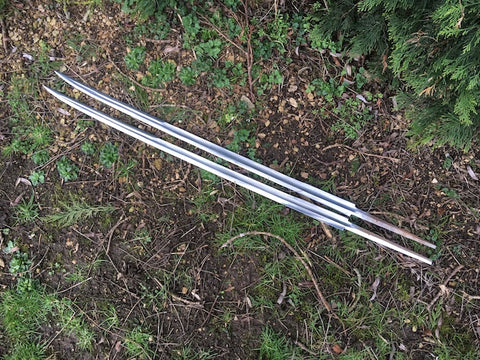
Pic of spine and tip
I profiled the blade and the heat treated so there was some hard grinding to get it down to 2mm by the tip. The next step was to grind a bevel in so that the transition point thickness between the fuller and bevel would be set, then the hollow went in, next the edge grind on the yelman and finally the appleseed grind to the main edge.
Pic of finished blades
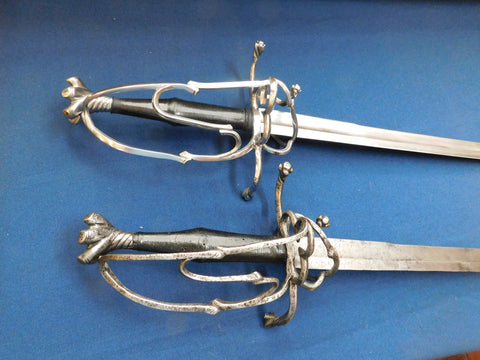
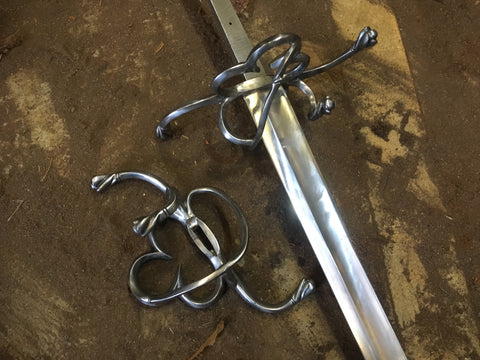
The guard is lovely and almost art nouveau in feel and like all complex guards must be made up piece by piece and welded and cleaned at each stage.
Pic of guard and early bars
The main guard is the first place to start and then slowly each piece is added and the whole piece is filed back, cleaned up and polished and then the next piece is added and in this way even the hard to reach areas of a finished piece should be reasonably well finished - it avoids you 'painting yourself into a corner'.
Next set of bars
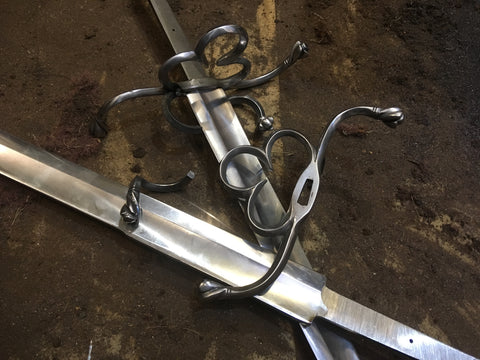
Saying that though, the original sword is a actually quite roughly made and a number of the guard welds are fracturing and not great and a deal of the file work has left lots of cut marks. This is not at all unusual in original pieces; we just look at them through rose tinted glasses and think they were all perfect - they weren't.

Original guard
The interaction between the pommel and the guard needs to be exact and so the next stage is to make the pommel, and then to go back to finishing the bars on the guard.
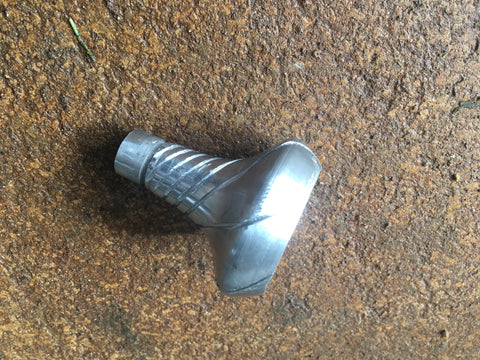
Pic of roughed out pommel
The pommel starts with a block of steel, that was turned to rough out the pommel form. The file lines for the twists were marked out and then hacksawed in to provide guides for the file. The cut lines were then filed in over a long, long time.
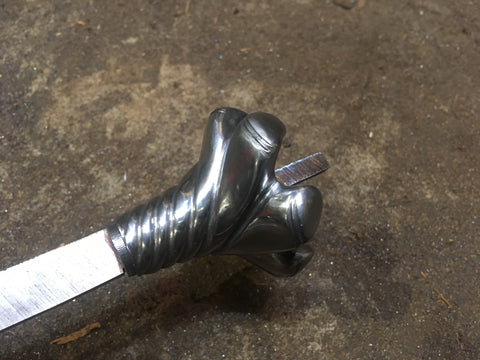
Pic of finished pommel
The tang was stepped down to accept the pommel and this step was carefully reduced until the pommel was the correct distance from the guard.
Pic of Guard and pommel on tang
The grip was made from two slabs of ash, a hollow cut in for the tang, glued together and shaped.
The grip is then covered in leather, bonded in place and crushed down with a cord binding.
Pic of cord binding
The pressure exerted by the cord is massive and so it compresses the leather down, holds it closely to the glue and also drives the glue through the leather to create a glue/leather composite. This binding will be removed in the morning and the leather burnished as the original was.
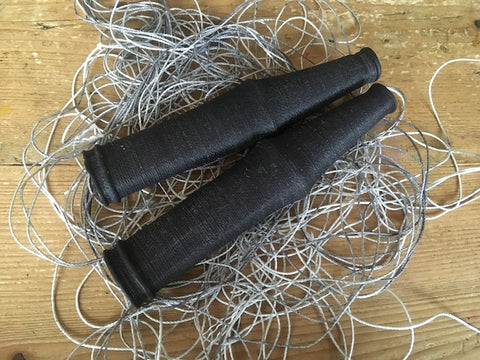
Pic of finished grip
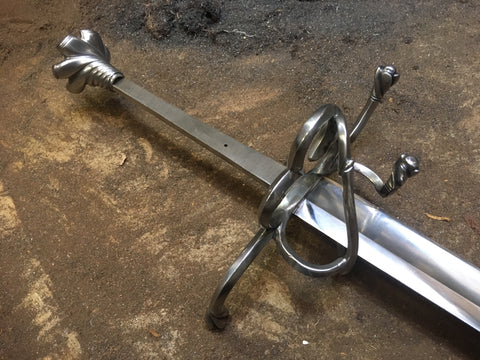
Fitting the grip also allows the clearances to be made correctly between the guard and the grip, rather than estimation, so now that the sabre has the lower guards, grip and pommel in place it is possible to make the knuckle guards.
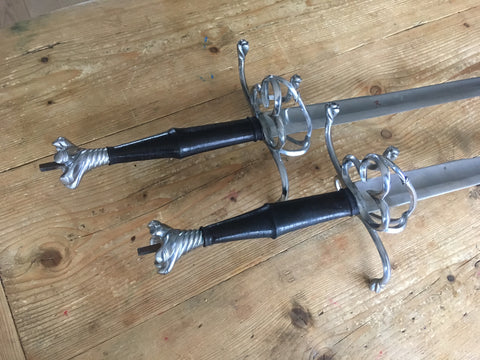
Pic of swords without knuckle guards
The two principle knuckle guard rods had the overlap section filed in and then they were bent to shape and welded, then the ‘S’guards were formed and fitted.

Pic of knuckle bow separate from sword
The process for me is to make up a bar, finish and polish it and then tack weld it in place and then make up the next piece, tack it to the previous piece and then cut away the previous piece with the new piece attached. I then finish these two pieces and start again. I could weld everything together in one go and clean up after, which would be much faster, but there are nooks and crannies I would never be able to clean up.
These bent guards are always difficult as there are no straight lines to act as a reference points and the photos do not (of course) ever tell the whole story. What this means in practice is that I bend up a piece of wire as I think it should be. I then examine the photos at different angles, holding the wire form up and squinting a lot and then I tweak the wire form to suit. I then use this as a rough guide to bend the rods and then fit them into position. The 'S' guard for instance bends in all three dimensions.
Our medieval counterparts were less concerned with the quality of finish and so all of this would have been welded and then cleaned at the end and this would make the whole process much faster, but we now require our swords to have a better standard of finish and so there is no alternative to this very slow and ponderous process.
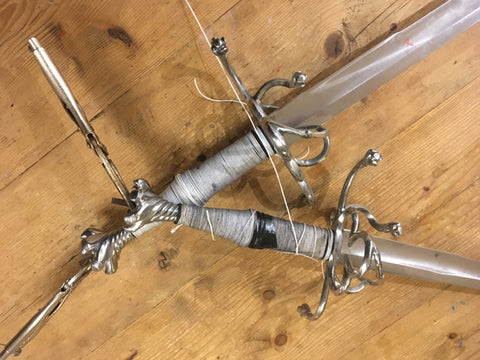
When making complicated projects I often make two pieces so that I am able to learn from the first and that is why two different swords appear in this Blog.
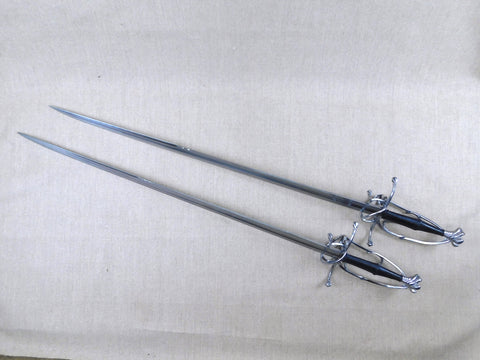
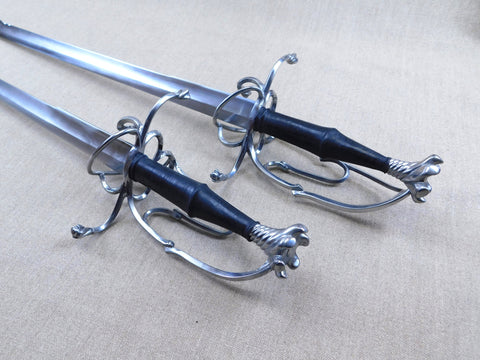
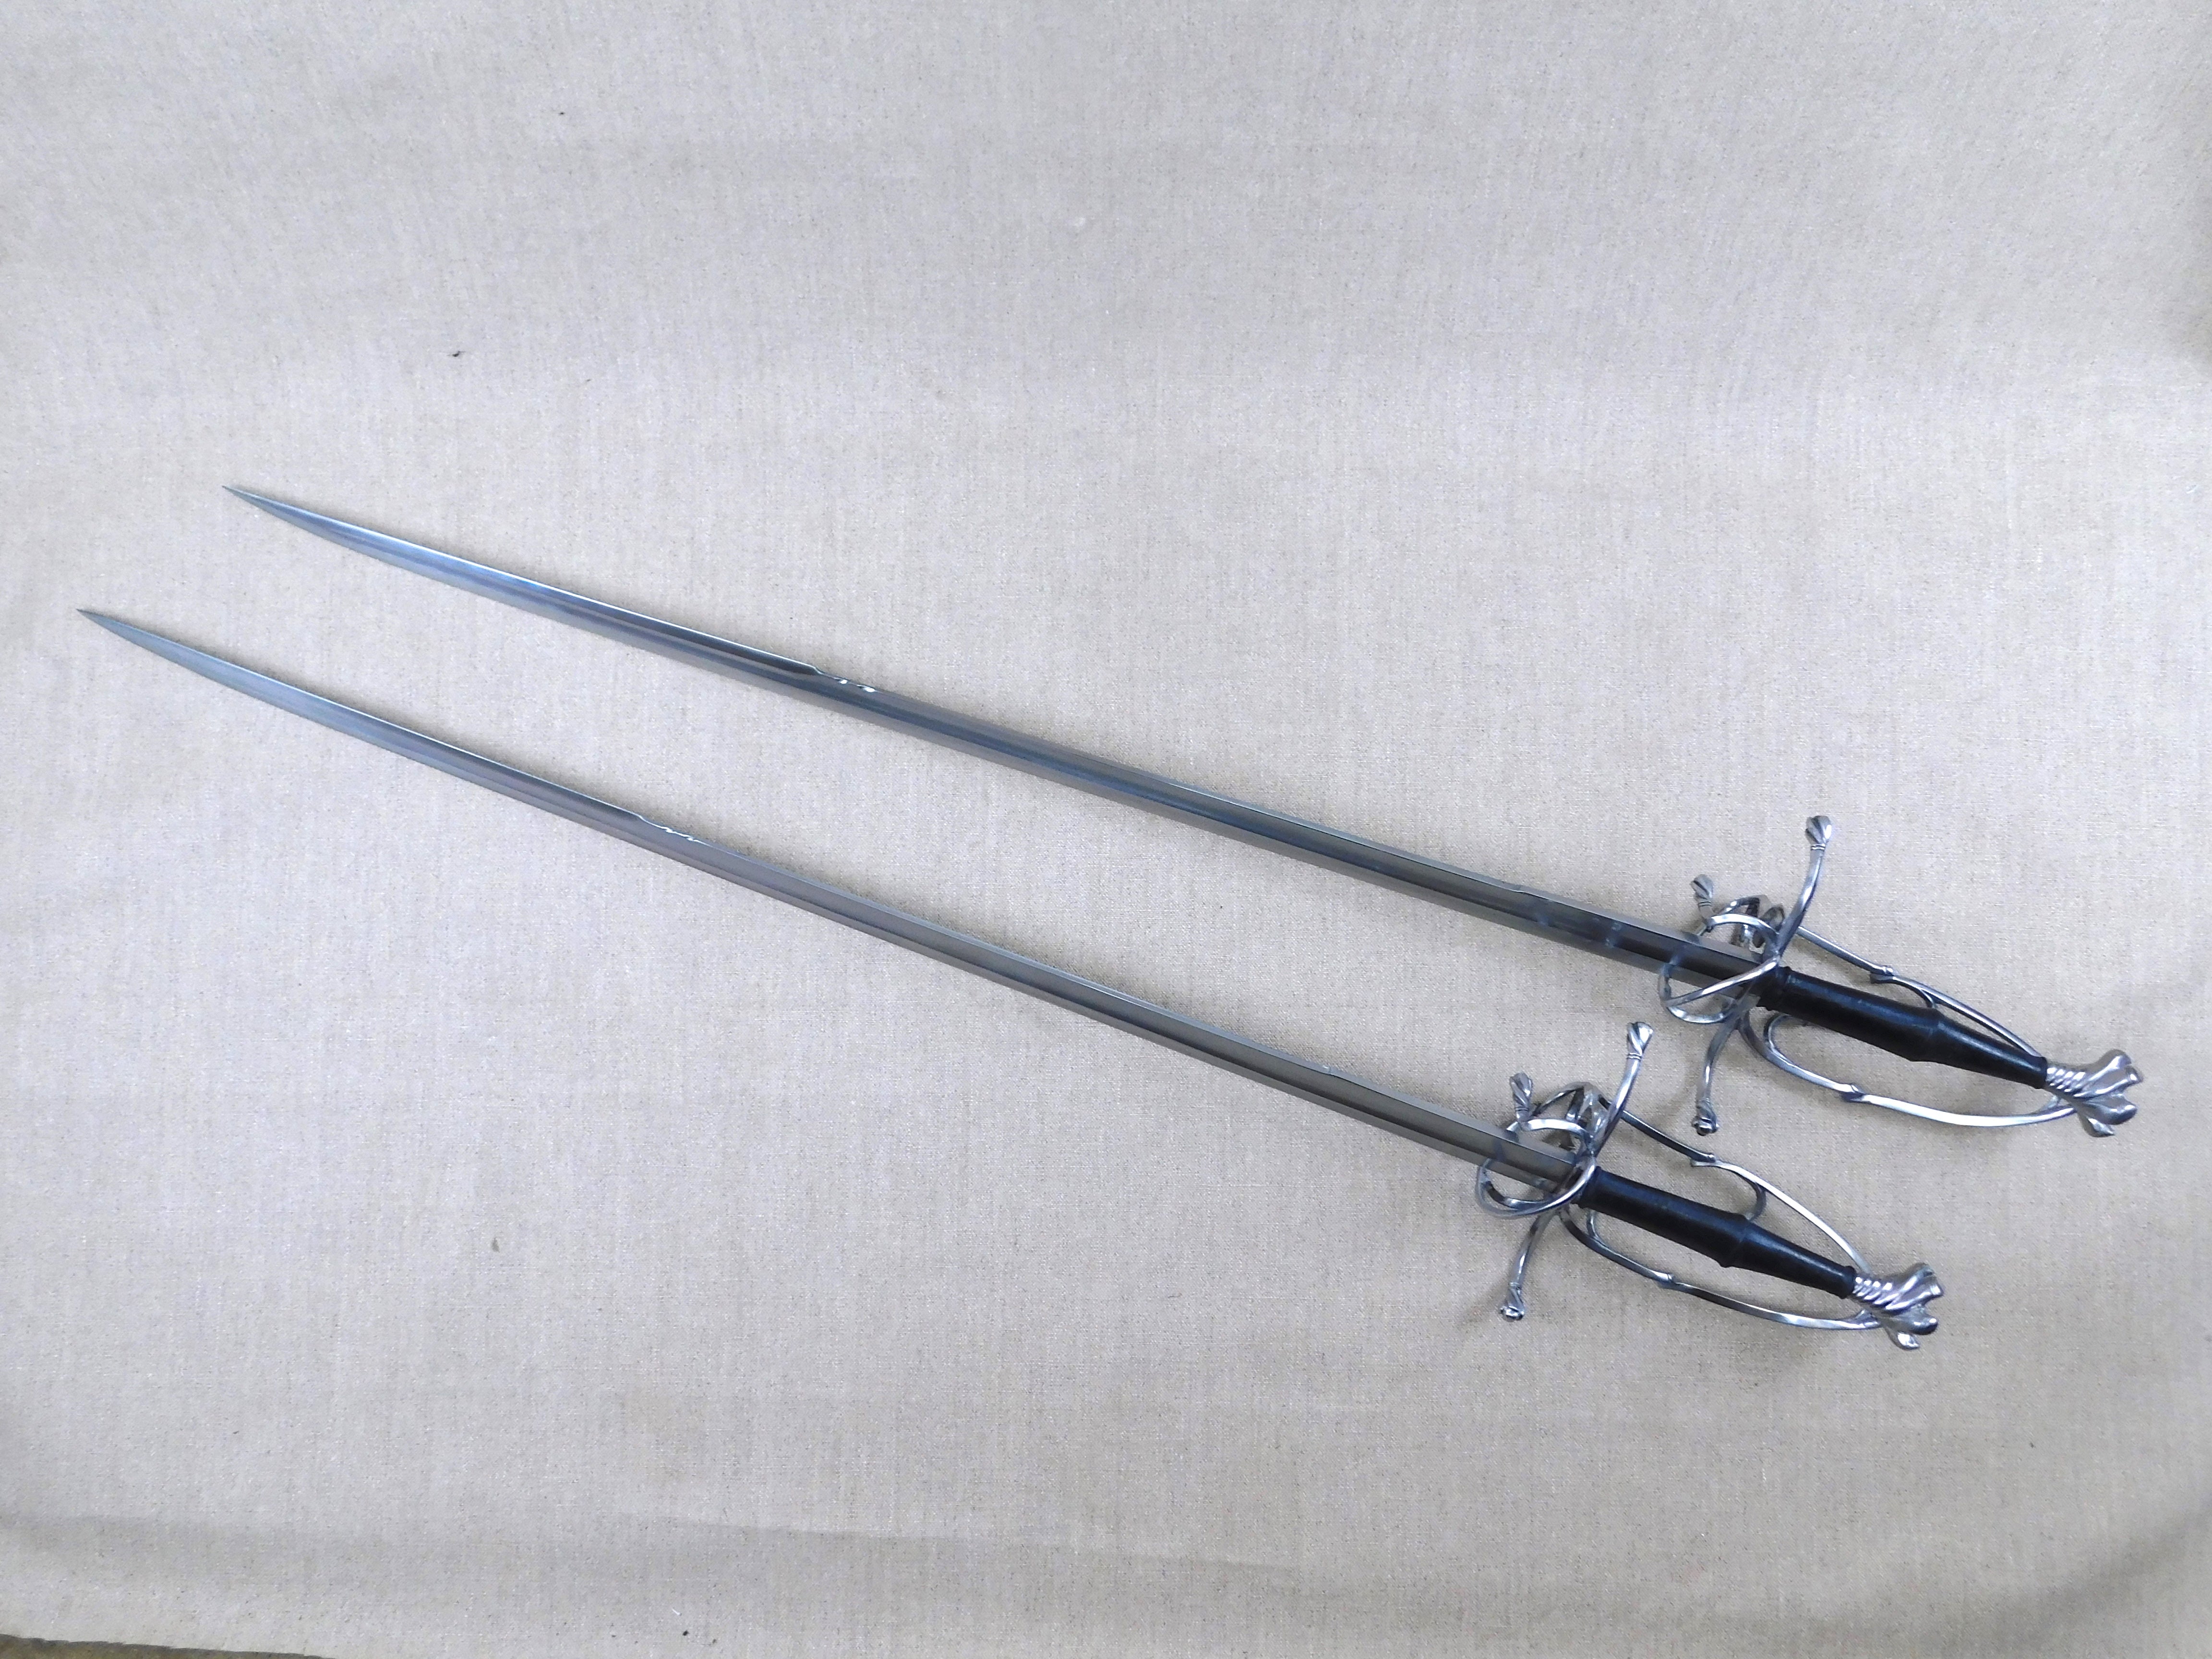
The finished A489 Swiss Sabres
The principle statistics for both swords are given below.
The original sword...
weight 1620g
blade length 1015mm
POB 97mm
sword 1
weight 1530g
blade length 1015mm
POB 95mm
sword 2
weight 1605g
Blade length 1018mm
POB 100mm
You can find my custom sword pages here
I separately documented this build on Instagram here https://www.instagram.com/todsworkshop
Also on My Armoury in this thread
Nathan Robinson asked me the following question on MyArmoury.
“Tod, I've read you say that these swords were the most difficult swords you've made. Can you share some thoughts as to what the challenges were and what difficulties you had to overcome?”
In response
“Part of it is psychological in that every aspect took a long time, so you work for ages and seem to have very little progress. The blade was slow going and was hard and required intense concentration, but the guard was also very slow going. Every bar had to be bent and checked against the view in multiple photographs at every bend and tweek, I handled the sword and traced and measured the blade, grip and guard and dimensioned as much as I could, however......I took photos myself whilst I handled the sword and I also have the excellent photographs from the Wallace, but presumably because of lens distortion, and optical stuff I don't understand, when I scaled my pictures and the Wallaces pictures and compared the dimensions to my drawing, I ended up with three different sets of dimensions. That was annoying and slow and required interpretation jiggling things about. This was rather unexpected and troubling especially as I am planning to take the sword back in to the Wallace, so hopefully I have got it close.
The other part of it is the sheer physicality of it. The blade is thick and as I usestock removal and as the blade was ground hard, it was difficult going. The blade is also unusually long and so that is very physical and on top of that the hollow grinding just requires one slip to destroy the blade and so every one of the thousands of passes had to be correct (or at least nearly correct). This of course means that you get tired and the more tired you get the more likely you are to make a mistake, so the process is also quite stressful. I made the blades first and t be honest that left me shattered for the rest of the week. “
The culmination of the whole project was a fascinating trip back into the Wallace Collection to take my reproduction back and examine the original sword and my reproduction side by side and you can watch a video of Toby Capwell and myself discussing the sword here
Also in Tod's Blog

Netflix 'The Witcher' Series 3, NOW OUT Thursday 29th June 2023
FINAL FANTASY XVI - TOD MAKES INVICTUS SWORD
The Final Fantasy series XVI, Clive Rosfield's Sword, INVICTUS made by Tods Workshop/Tod Todeschini. Its in the Tower of London from 22nd !